Blueprints
Overview
With the release of Conduit version 3, a new app blueprint builder was developed from scratch and extended to support a vast array of configurations even with programmatic markup or (Infrastructure as Code) capabilities.
App Blueprints allow pre-configured full multi-tier application deployments for multiple environments. Blueprints can be provisioned from the Provisioning -> Apps section and can be fully configured for one click provisioning. Blueprints can be built within the Builder section or by code in the Raw section. Blueprints can also be exported as YAML or JSON and created with the Conduit API and CLI.
Some unique capabilities of the YAML/JSON based Conduit blueprint structure is it’s ability to have multiple configurations per instance being provisioned within the app blueprint. This can be a scoped configuration that acts as overrides based on selected cloud or group the app is being provisioned in as a target. The environment can also be used as a scope. Maybe the “development” environment doesn’t need as many horizontally scaled nodes (for example) as the “production” environment. Another great aspect of this configuration markup is a blueprint can be defined as a hybrid cloud blueprint. This makes the app blueprint structure very powerful and in some ways better than alternative infrastructure as code orchestrators. For Example, ARM is locked into Azure, while Cloud Formation is locked into AWS. Even Terraform does not allow a tf file to expand its bounds beyond a specific provider type.
Basic Blueprint Structure
In a Conduit App Blueprint there are a few structural concepts to be aware of. Firstly there is a concept of a Tier. A Tier is a grouping of instances within an app blueprint. Tiers can be used for a variety of things including sequenced booting of instances or even properly creating endpoint groups and security group contexts in network security tools like Cisco ACI. An example of a Tier structure might be a Web tier and a Database tier. These tiers can also be marked as connected such that network communication rules can appropriately be defined. A basic 2 Tier blueprint skeleton might look something like this:
name: Tier Example
type: conduit
tiers:
  Web:
    linkedTiers:
      - Database
    tier:
      bootOrder: 1
    instances:
  Database:
    tier:
      bootOrder: 0
    instances:
This example has defined 2 tiers as yaml properties under the tiers object. They are called Web and Database. A Tier can optionally define its connected tiers which are bi-directional even though only one tier has to define them. This is the linkedTiers array and simply lists the connected tiers by tier name. A Boot Order can also optionally be defined under a nested {"tier": {"bootOrder": 1}} object structure.
Configuration Scopes
Another capability of Conduit App Blueprint structure is its configuration scoping. This allows properties to be overridden based on the apps target environment or even target group and cloud. For example. Maybe we want to use a larger plan size in production vs. development
An example of that can be done using “environments” overrides.
name: Simple Nginx
type: conduit
tiers:
  Web:
    instances:
      - instance:
          type: docker
          name: Sample Nginx
        clouds:
          AWS Cali:
            instance:
              layout:
                code: docker-1.7-single
            config:
              dockerImageVersion: latest
              dockerRegistryId: ''
              dockerImage: nginx
            plan:
              code: container-128
         environments:
           Production:
             groups:
               All Clouds Demo:
                 clouds:
                   AWS Cali:
                     plan:
                       code: container-256
Note the new environments object. The object graph of the conduit blueprint structure gets merged and flattened at provision time based on the scope of the configurations provided as well as the users target cloud, group, and environment selection. In the Above example, a selective override was done for the AWS Cali cloud when using a Production Environment and deploying to the group All Clouds Demo. This specific example changes the plan to a larger size. Scoped configurations have various levels of precidence. Cloud is the lowest level of precedence. a cloud configuration in a group is the next level higher and finally an environment configuration in a group in a cloud is the highest level of scoped precedence.
Getting Started
To get started, it may be best to look at a simple App Blueprint configuration. Docker templates are less complex than virtual machine based templates so lets look at a Blueprint that deploys a single nginx container to a target cloud:
name: Simple Nginx
type: conduit
tiers:
  Web:
    linkedTiers: []
    instances:
      - instance:
          type: docker
          name: Sample Nginx
        clouds:
          AWS Cali:
            instance:
              layout:
                code: docker-1.7-single
                id: 206
            volumes:
              - rootVolume: true
                name: root
                size: 1
            backup:
              createBackup: false
            config:
              dockerImageVersion: latest
              dockerRegistryId: ''
              dockerImage: nginx
            plan:
              id: 68
              code: container-128
            ports:
              - name: HTTP
                port: 80
                lb: HTTP
Theres some useful things to look at in the above docker example. One is there are different objects based on the different available configuration options for the target provision type. These options are actually data driven and can be extracted from the option types api in the conduit api doc. That is a useful resource to look at while building conduit blueprints or by using the conduit-cli which provides prompts for helping build custom conduit app blueprints.
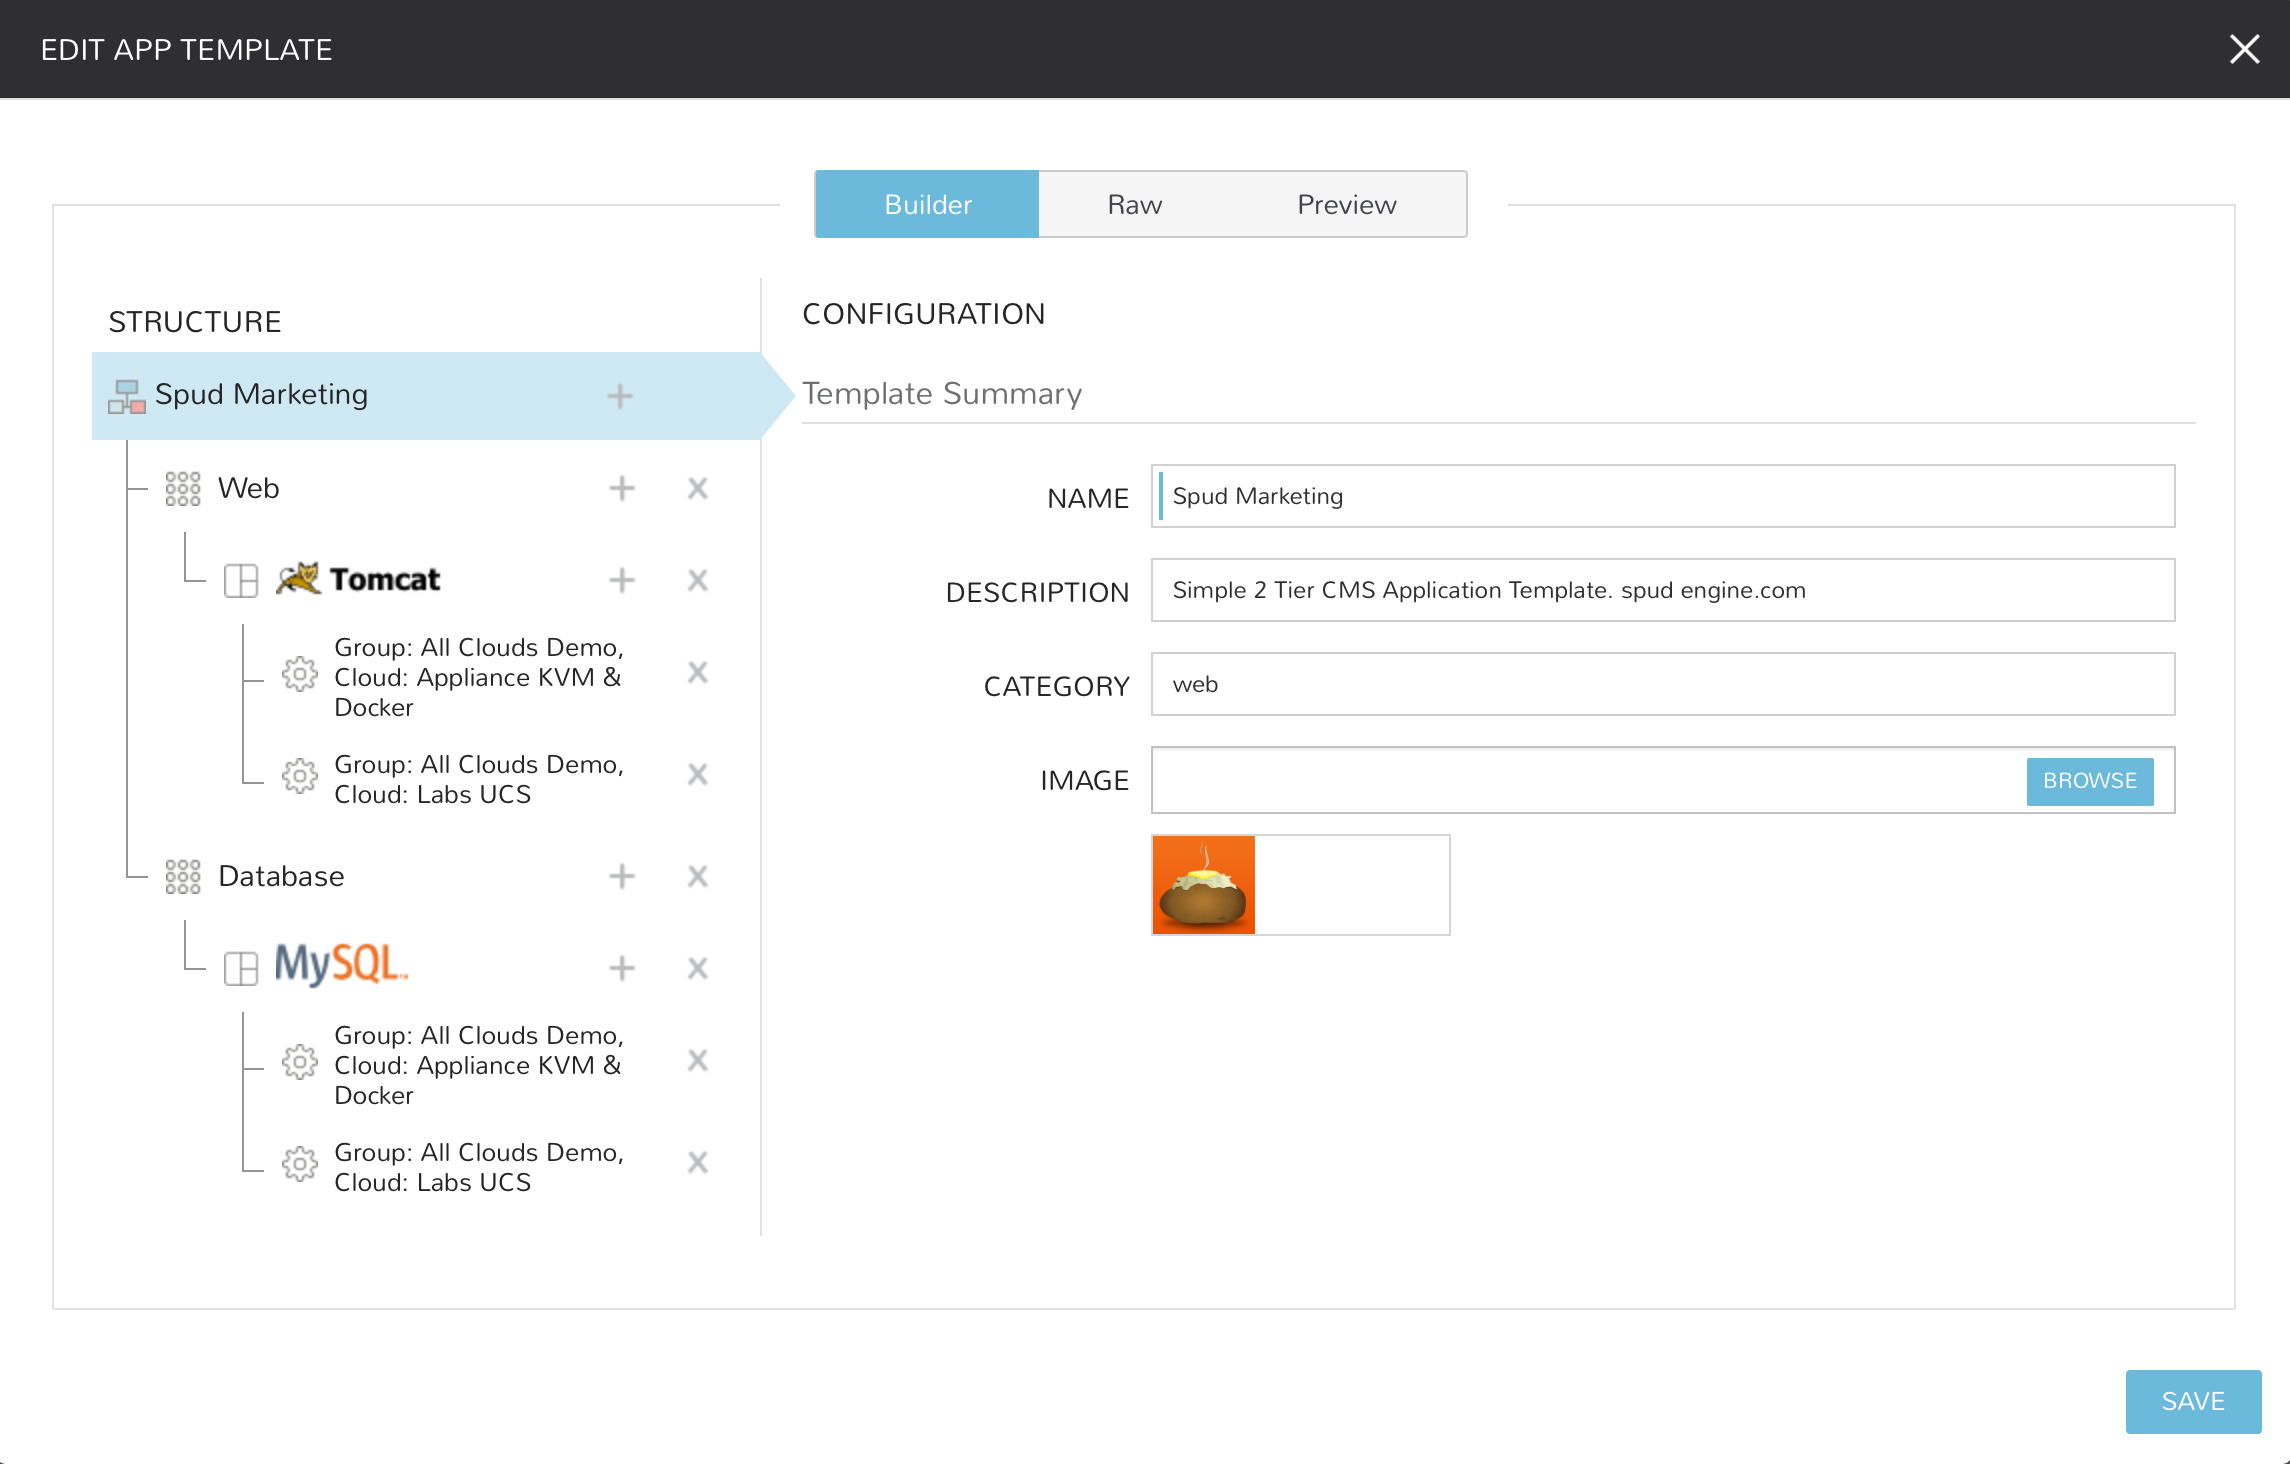
Creating App Blueprints
- Navigate to
Provisioning -> Blueprints - Select + ADD
- Enter a NAME for the Blueprint and select NEXT
- Optionally add a Description, Category, and Image for the Blueprint.
Add Tiers
- In the STRUCTURE section, select + to add a Tier
- Select or enter a Tier Name.
- Select the Tier to set Boot Order, rename, or once multiple Tiers are added, connect the Tier to other Tiers.
Add Instances to Tiers
- In the STRUCTURE section, select + in a Tier to add an Instance
- Select an Instance Type
- Optionally add a name for the Instance. Instances with blank names will automatically be named based off the App name.
Tip
You can use the variable ${app.name} in your instance naming convention to reference the name of the application you’re deploying.
Add Configurations to Instances
- In the STRUCTURE section, select + in an Instance to add a Configuration
- Select at least one option from Group, Cloud or Environment.
- Select
ADD CONFIGto create the configuration - Populate the Configuration
- Configurations can be fully partially or populated
- Fields can be locked by selecting the Lock icon next to the Field. Locking prevent the field from being editable when provisioning an App using the Blueprint.
- ALLOW EXISTING INSTANCE will allow users to add existing Instances to the App when using the blueprint
Save
Once all desired Tiers, Instances and Configurations are added, select Save. The Blueprint will be created, can be edited after saving, and will available in the Apps section for provisioning.
Note
Blueprints are not provisioned when created. To provision a Blueprint, use Provisioning -> Apps.
RAW
Blueprints can be create, edited or Exported in the RAW section when creating or editing a blueprint.
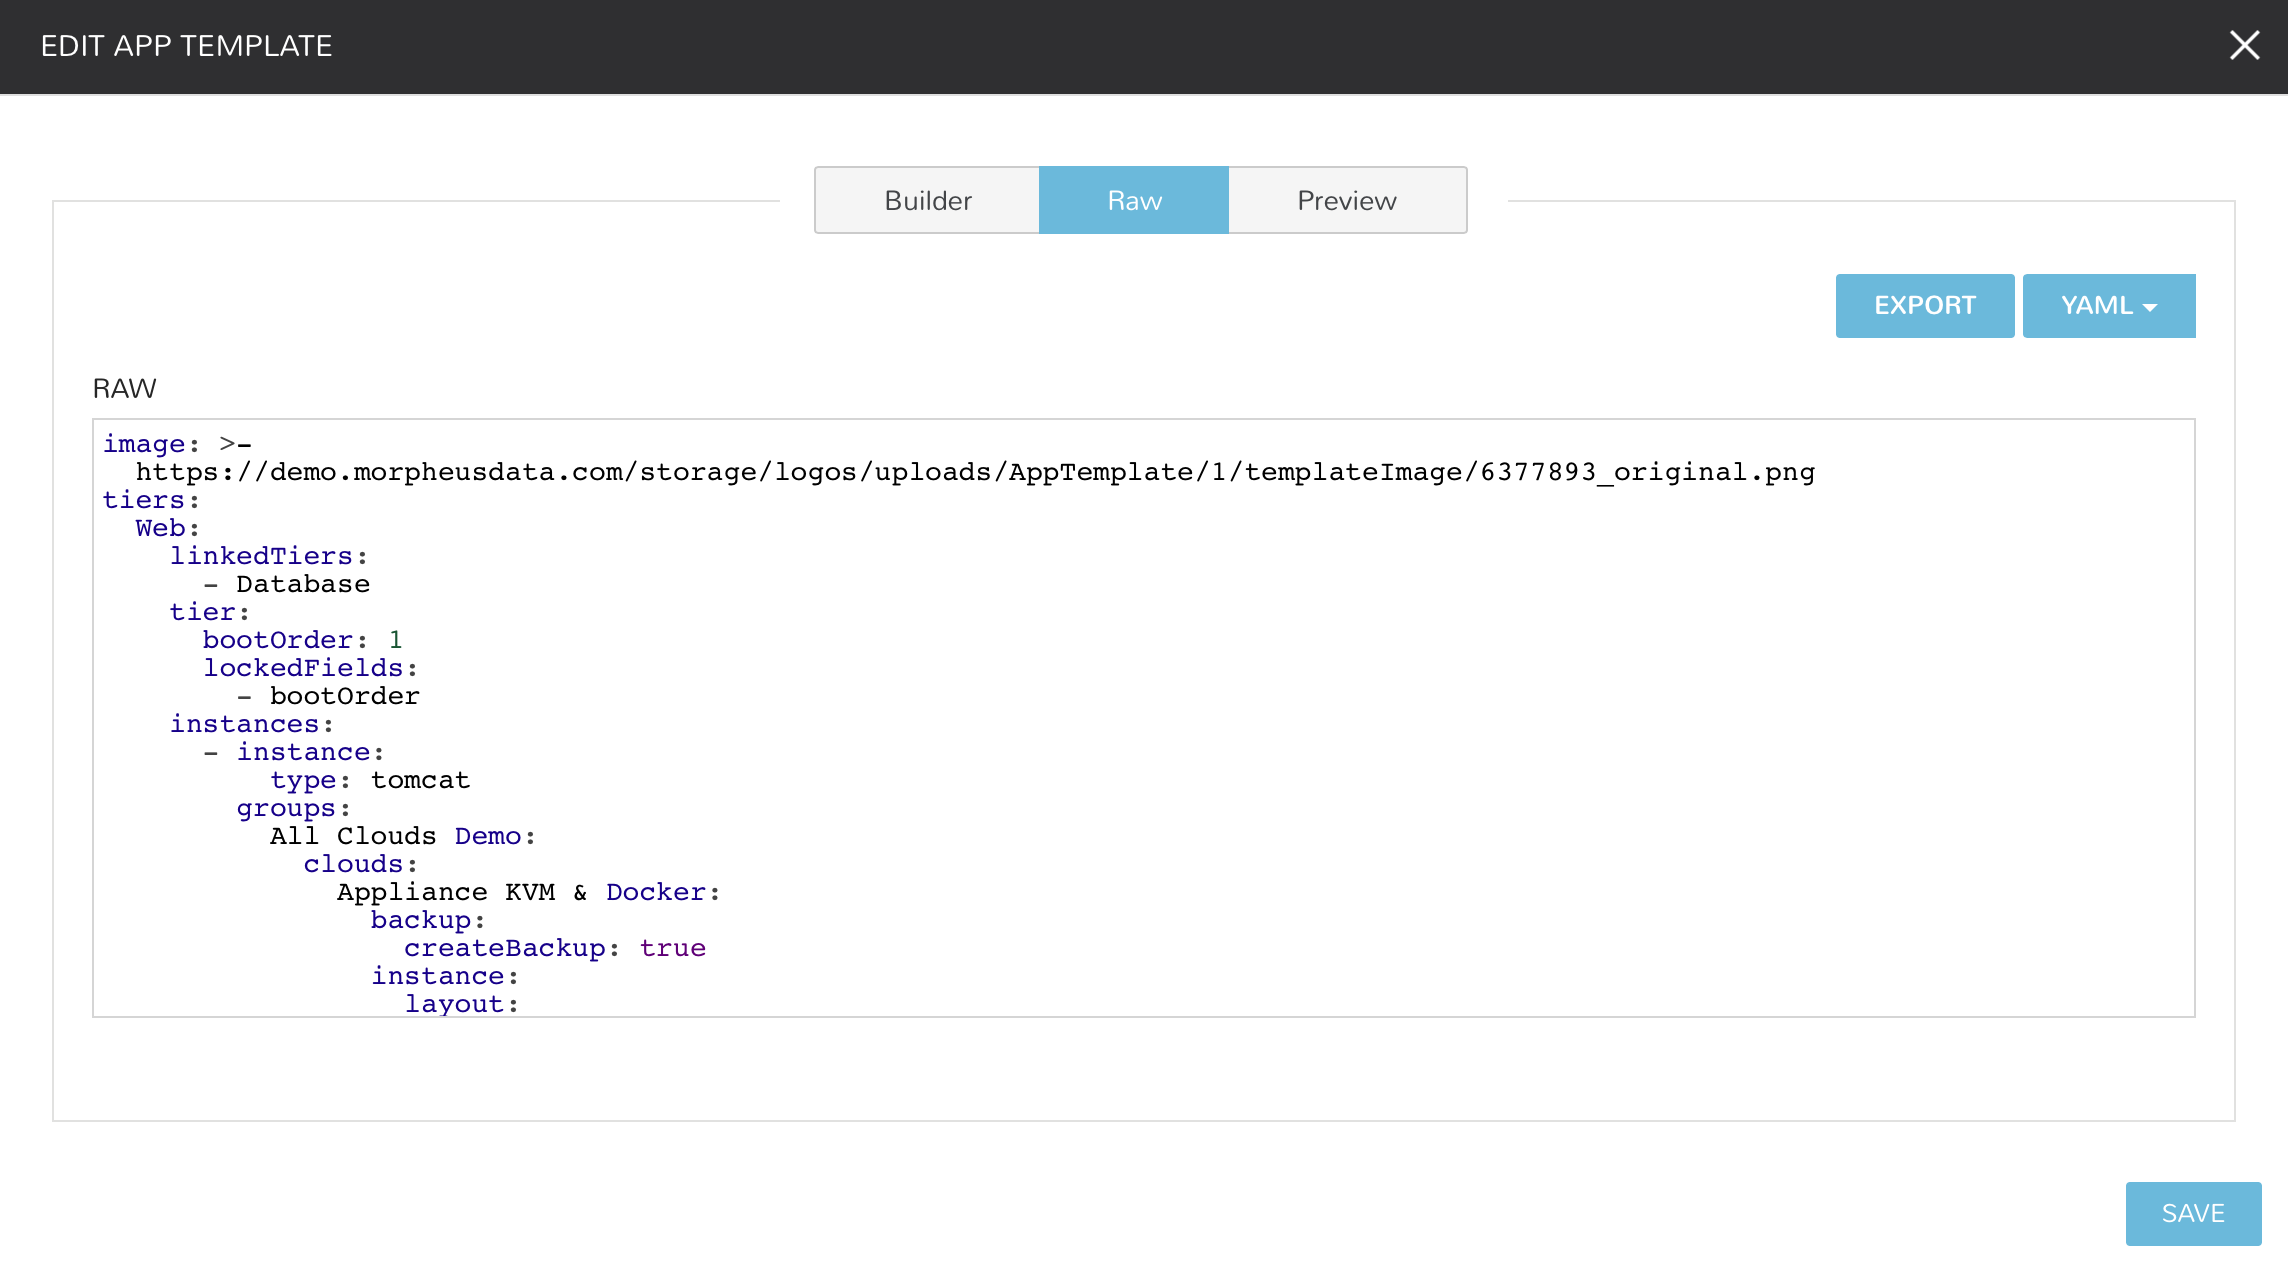
To Export a Blueprint as JSON or YAML:
- Create or Edit a Blueprint
- Select the RAW section on the top of the APP BLUEPRINT modal.
- Select JSON or YAML in the top right of the RAW section.
- Select the EXPORT button.
- Select the Configurations to include in the Export by clicking on a Configuration. Selected Configurations will be highlighted.
- Select the DOWNLOAD CONFIGURATION button.
- The Blueprint Export file will be downloaded to your computer as {template_name}-config.json or {template_name}-config.yaml.
Preview
In the APP BLUEPRINT modal, select the Preview section to display a graphical representation of your Blueprint Tiers, Instances and Tier Connections.
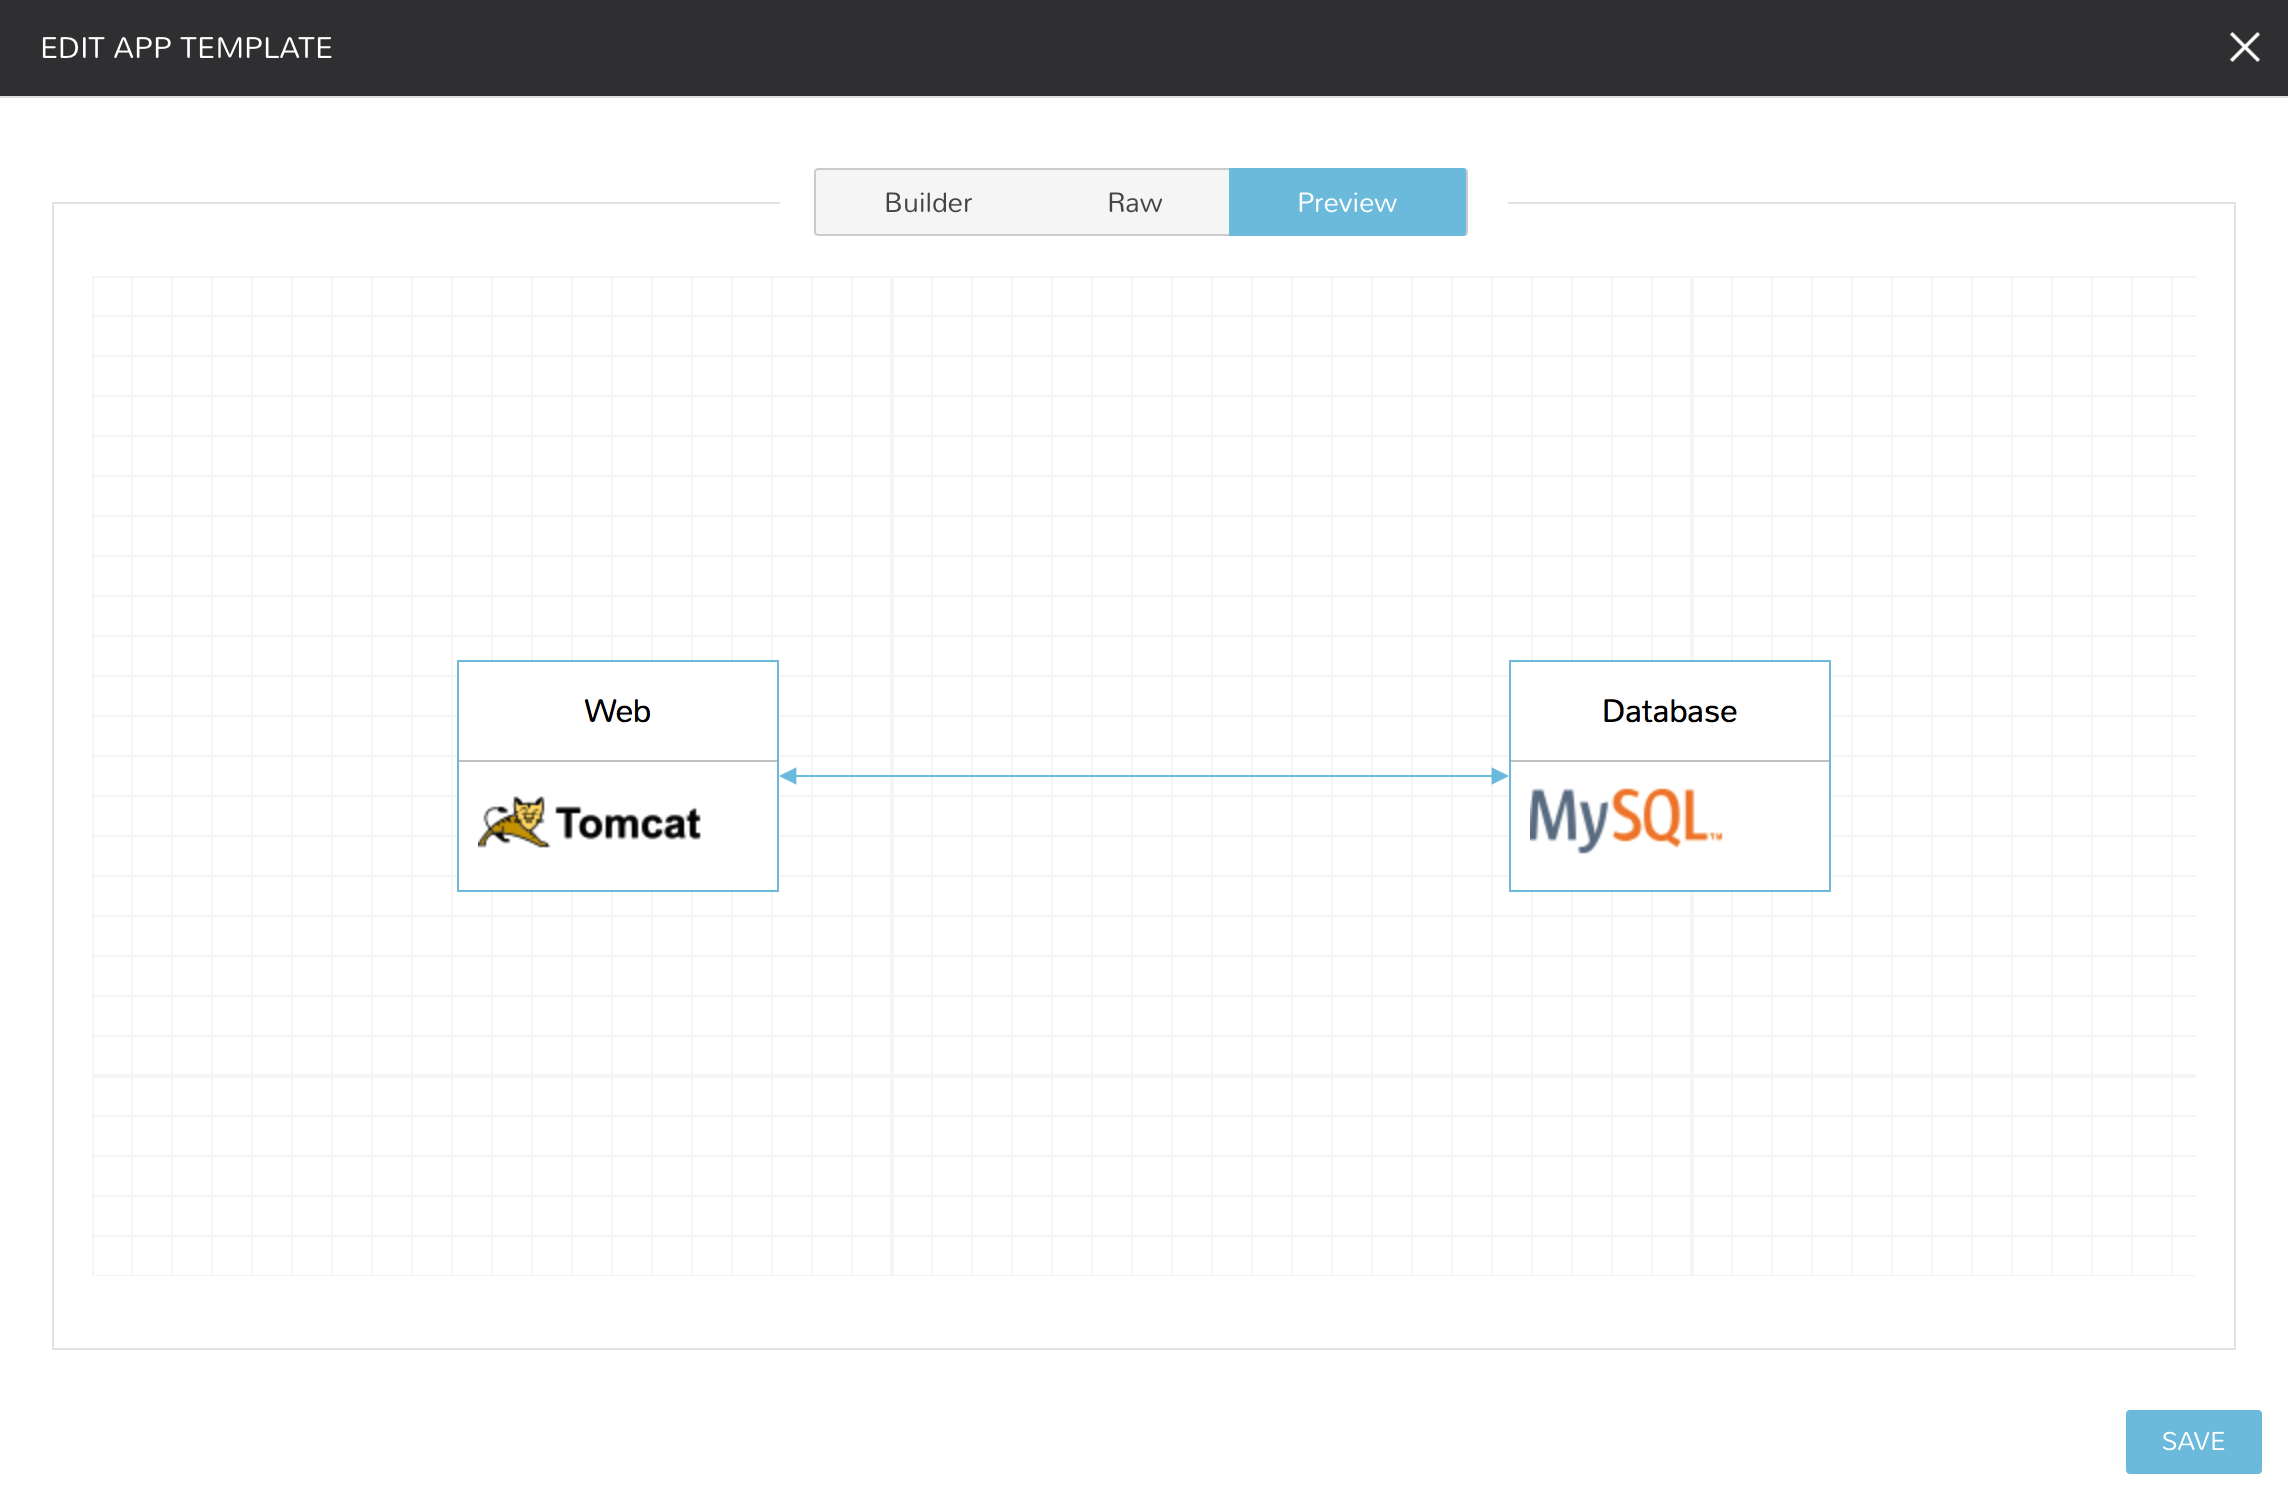
Important
When Tiers are connected, the Instances in a Tier will import the evars from Instances in connected Tiers, and if |conduit] is managing the Instance Firewalls, communication between the Instances will be facilitated based on the Instances port configurations.
Provisioning
To provision a Blueprint, navigate to Provisioning -> Apps and select the Blueprint when creating an App.